
Algorand Wallets are an important part of cryptocurrency ownership. When you keep your funds on an exchange such as Binance or Coinbase, you are trusting that they will not mis-manage it and that you will be able to withdraw it. This assumption was proven wrong recently when FTX, the second largest crypto exchange in the world, went insolvent and lost billions of dollars of customer funds.
Fortunately, it is easy to move funds off of exchanges and onto “self-custodial” wallets, which means that you alone own the keys to your account.
In this article, we will discuss the types of Algorand wallets; including exchange wallets, “self-custodial” wallets, and hardware wallets like Ledger and Trezor that offer maximum security. We will talk through the pros and cons of each one, and share information about how to get started with a hardware wallet setup.
Note: I am not sponsored by anyone, but I do use my referral links.
Table of Contents
Non Custodial Exchange Wallets: Positives and Negatives
Self Custodial Wallets: Pera and MyAlgo
Hardware Wallets: Using Ledger on Algorand
How to Set Up Ledger on Algorand
Algorand Crypto Exchange Wallets
Security: Low
Convenience: Very High
Control: Very Low
The first place you purchase $ALGO is likely on an exchange, which holds your crypto on an exchange wallet. These are custodial wallets, which means you don’t own them, and the exchange has control of your private keys and thus funds. Your exchange wallet is also almost certainly a “hot” wallet, which means that it is connected to the internet. This makes it way faster to transact and interact with your holdings.
Crypto exchange wallets get a lot of flak in the crypto community, and for some good reasons, but there are also upsides and good reasons to use them
Crypto Exchange Wallet Positives
Exchange Wallets are Convenient: Your wallet is often connected to your back account. There is no faster way to cash in and out of crypto than via an exchange wallet. You can trade faster and access assets on different blockchains. Because you usually have to KYC (provide your personal credentials), you can access regulated trading areas.
Exchange Wallets Are Responsible For Your Funds: This can be a positive, or a huge negative depending on what exchange you use and how much you trust them. In the case of security vulnerabilities or hacks, exchanges will take responsibility and attempt to make you whole. Of course, this trust can be absolutely misused. FTX is a top three exchange and just lost billions of customer dollars due to fund misuse. Tragically, most users of FTX will be SOL.
Crypto Exchange Wallet Negatives
Not Your Keys, Not Your Crypto: You don’t explicitly own the crypto you hold on an exchange. If your exchange fails or misuses your funds, you may have no recourse to it. You have no control over withdrawing your funds, and can have your funds frozen at the most inopportune times.
Your Funds are Only as Safe as Your Exchange: Exchanges are centralized identities which can act upon their own principles. They may think it is fine to use your funds for leverage, while you may not. But there is nothing you can do about it if your funds are held on an exchange that starts to do this— other than removing it.
You Can’t Access DeFi: The whole point of crypto and the blockchain is to create a decentralized world where you can transact and control what you do. With exchanges wallets, you simply cannot access DeFi on your own. A huge downside.
Given the downsides of holding your assets on an exchange, it makes a lot of sense to move them off. The best way to do so is to move it to a “Self-Custodial Wallet,” which can be software or hardware like Ledger.
Algorand Self-Custodial Wallets

Security: High
Convenience: High
Control: Very High
Self-Custodial Hot Wallets are the most used wallets on Algorand. When you use a self-custodial wallet, it means you are the sole owner of the keys and recovery phrase. No one else can access your funds, which also means no one else can prevent you from transacting or doing whatever you want with them. You don’t need to provide credentials, which means any person in the world can sign up for one. You can use a self-custodial wallet fully anonymously.
On the flip side, this also means that you hold all the risk of your funds. Lose your recovery phrase or get it stolen, and all your funds can be lost or depleted.
The three main self-custodial wallets on Algorand are the Pera Wallet (mobile wallet), MyAlgo (browser wallet), and Defly Wallet (Power Users, Mobile). All three are wonderful wallets that I’ve covered before, so I won’t spend too much time on them. You can read more about the Pera and MyAlgo here.
Let’s move on to Hardware Wallets, specifically Ledger.
Algorand Hardware Wallets: Ledger
Security: Maximum
Convenience: Medium
Control: Very High
A Ledger Hardware Wallet is the safest way to store your cryptocurrencies. Hardware wallets are physical devices that keep your private keys offline. They are both self-custodial (you own your keys) and cold (not connected to the internet). They allow you sign transactions without your private key ever leaving your device, meaning they provide the maximum security for using your crypto. Since they are self-custodial, there is no way for anyone to access your crypto, ever. No black swan crypto event like FTX would cause you to lose control of your funds.
There are some drawbacks to hardware wallets, of course. The first is the initial cost; since you have to actually buy the hardware wallet. Ledger is the hardware wallet that works best with Algorand (Trezor doesn’t yet have support), and you have the choice between the more expensive Ledger Nano X or the cheaper Nano S Plus.
The second big drawback of hardware wallets is that it usually has less accessibility. Because you have to sign transactions from the device, it can be inconvenient for frequent day-to-day activities and better serves as a safe-haven for your most valuable digital assets.
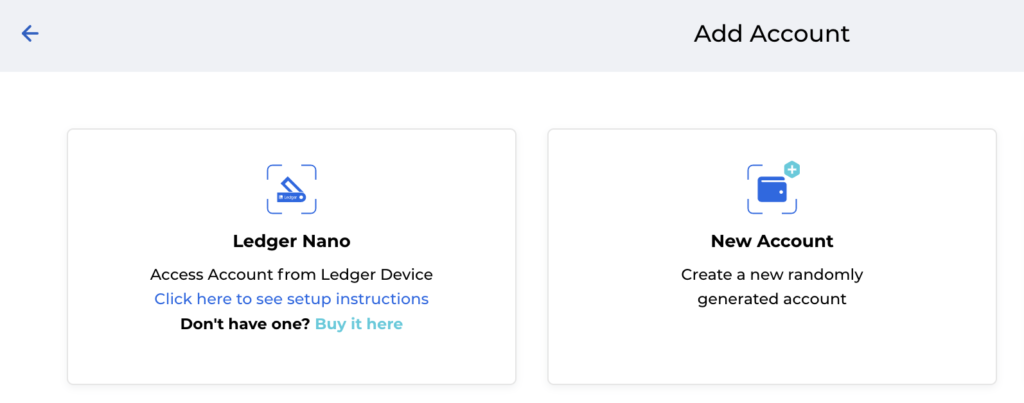
That said, MyAlgo has exceptional support for the Ledger Nano and makes it super easy to import and transact with your ledger stored wallet addresses. Pera Wallet also has a great “watch” feature.
Setting Up a Ledger Wallet on Algorand
Once you have obtained a ledger hardware wallet, you then have to go through and set up your wallet with Ledger Live. Thankfully it’s become quite easy as Ledger and Algorand integration have continued to improve with firmware updates. Here are step by step instructions to connecting your Ledger device to an Algorand Wallet. If you want to follow more official instructions from Ledger, read here.
What you need: A ledger device, computer, ledger live, and a micro USB cable.
Step 1: Download Ledger Live on your Computer
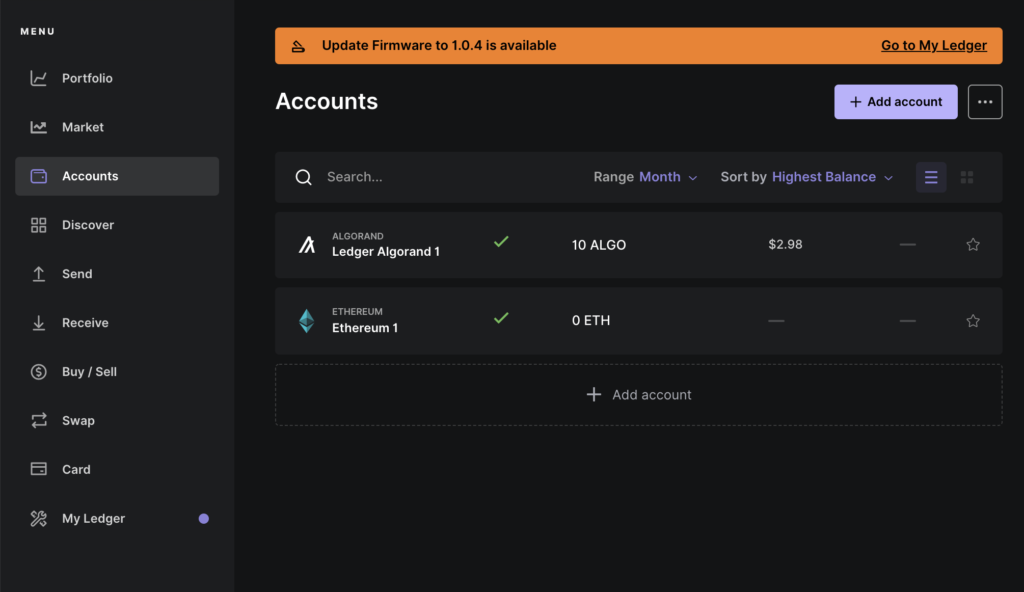
Ledger Live is a must have companion app to interact with your ledger. It is how you install firmware updates, add new accounts, and view your account. I believe it is possible to interact with your ledger without using Ledger live, but it’s a much more completed process and Ledger Live is a great product.
Step 2: Connect your device to your computer using a cable and navigate through the on-screen instructions. Click with both buttons to choose the option to set up a new device.
Step 3: Choose your PIN code. Choose something you will remember, or write it down. If you forget your PIN, it is a pain to recover by adding your recovery phrase manually.
Step 4: Write down your recovery phrase. This is the master key to your account, if someone gains access to these words they can access all your funds. Never, ever share it with anyone. Don’t store these words online in the cloud either. I recommend using a bank vault.
Step 5: Go to my ledger, and search for the Algorand App.

Step 6: Install the Algorand app and confirm any transactions you see.
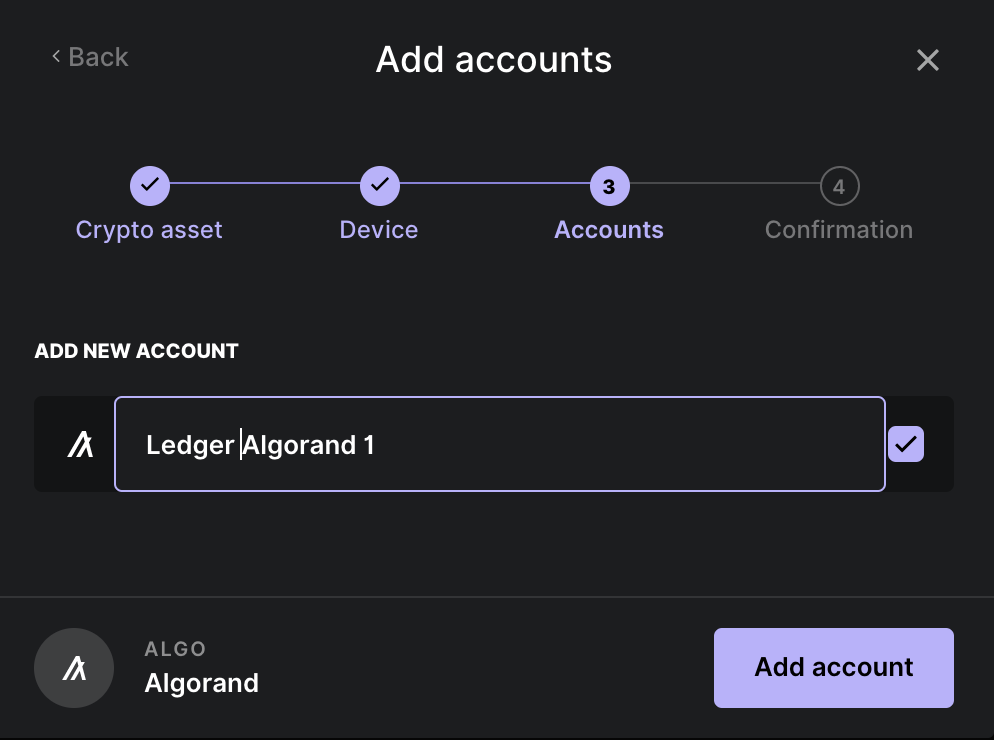
Step 7: Add a new account, select the Algorand asset, and go through the onboarding flow.
Step 8: Success! You now have a Algorand Ledger Wallet, and are storing your crypto and ASAs in the safest way possible. You can keep it as is or you can connect it to MyAlgo for a more seamless integration.
Dive Deeper Into the Algorand Ecosystem
If you want to stay up to date on Algorand, follow @algonautblog on twitter.
Keeping up with this blog and reading other articles is a great way to learn about the ecosystem. Here are some of my most well received articles:
Stake $ALGO and Maximize Algorand APR Rewards (2023)
Algorand Explained: Without Using A Single Crypto Term
The Ultimate Guide to Easing Into the Algorand Ecosystem
Best Sources of Income on the Algorand Blockchain: V3.0
Thanks for reading!